
My Hovercraft:
Part 2
The Bottom Skin
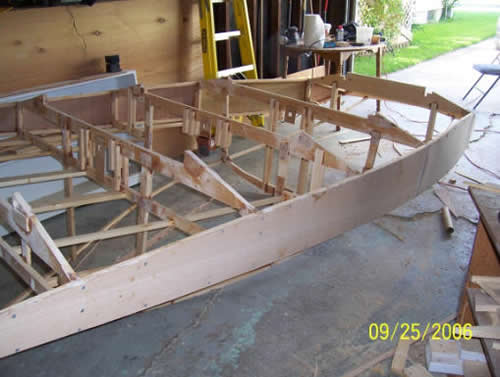
September 25th, 2006: The first part of skinning the craft is the sides shown here. Although I think the nails I used were too big, oh well. Live and learn.
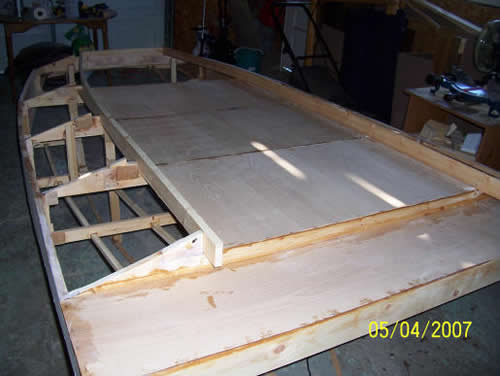
May 4th, 2007: OK, it has been sometime since I actually worked on the hovercraft. The weather was rather chilly and my garage does not have heat. So I took the winter off. But now that the weather is warm again it is time to restart. I cut out the bottom pieces last fall but I finally attached them in spring. I used rust resistant staples this time and boy did that save me a lot of hassle. The nails were starting to split the stringers when I put them in on the side. I also put in the runners that line the center middle but they have yet to be permanently attached. Next onto the bottom of the sides. I just need to purchase some epoxy first.
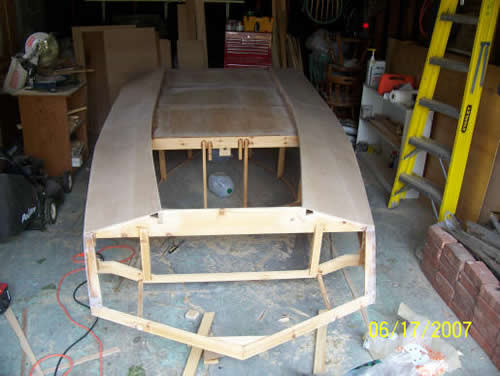
June 17th, 2007: The middle runners have been epoxied in and attached to the bottom that I put in above. Next came putting the bottom skin on along the sides. Now that that has been done and smoothed out it is starting to look really good.
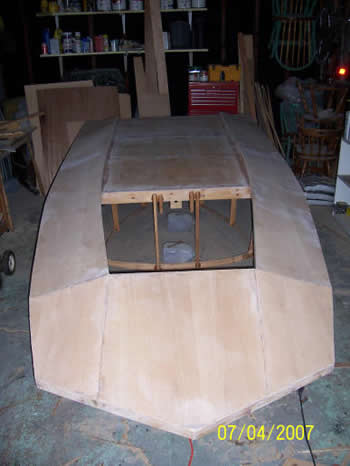
July 4th, 2007: The final skin piece has been attached to the bottom front. First I put in some support pieces from rib 2 to the front since I was not sure I could bend the skin the way they wanted me to. Next the skin was attached and smoothed over. The next part is to fill in the holes and smooth it out, attached some exterior stringers for support and landing skids then I can finally flip it back over.
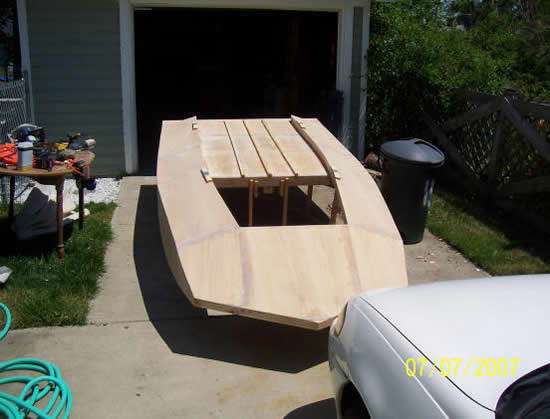
July 7th, 2007: The bottom is finished for now. The bottom stringers are attached and the landing skids are on. Time to flip it and start from the top down.
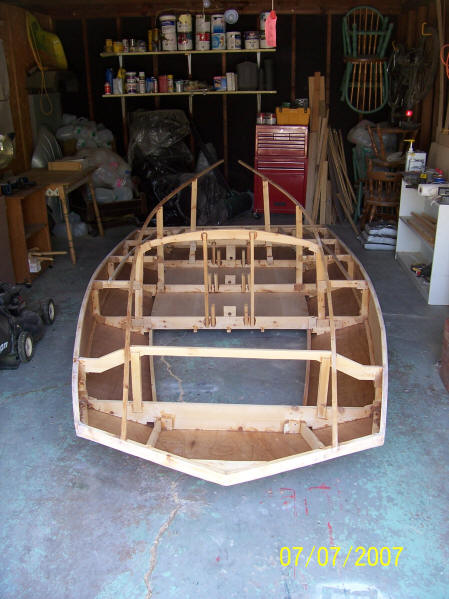
July 7th, 2007: View from the top after it was flipped over.
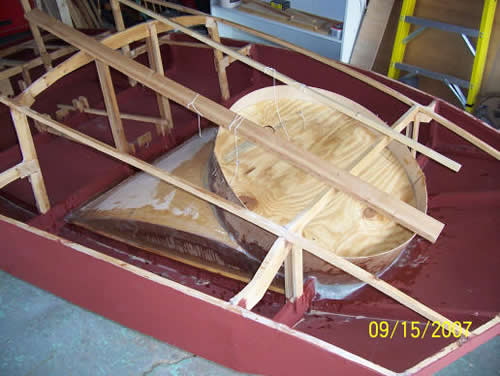
September 15th, 2007: Lots of progress since last update. The inside has been painted with super expensive copper paint. The lift duct has been formed and attached. To form the lift duct the main circle was wrapped around 2 plywood discs (to be discarded eventually). I then suspended the disc by the wood strips shown. I built the rest of the duct around the suspended circle. The next step is to flip it back over, finish off the duct, paint and lacquer the bottom, the flip it over and fill it in. No big deal.
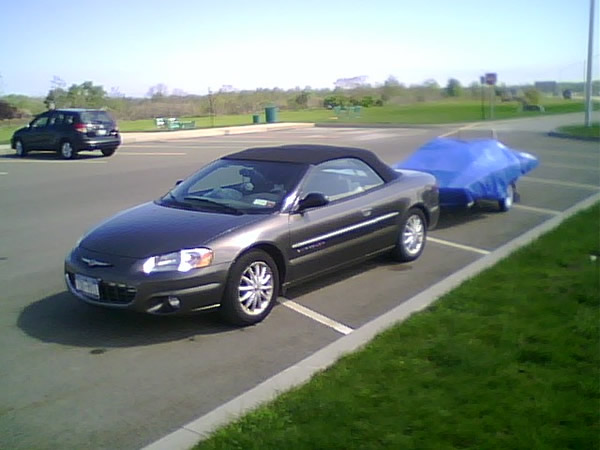
May 2008: Well, moving from Buffalo to Salt Lake City caused a pretty big upheaval in the hovercraft building process. Here it is attached to the car and still all covered. Several problems developed from the move though. I needed to get some straps to keep it down and I tightened them too much at times so it ended up crushing parts of the skin added previously. Also I could only afford a 4' wide trailer instead of a 6' wide one. The 4' wide one was about $300 as opposed to over $1200. But to solve the problem with the trailer I had to cut holes out of the bottom to fit the wheels through. These now need to be replaced as well as the crushing fixed.
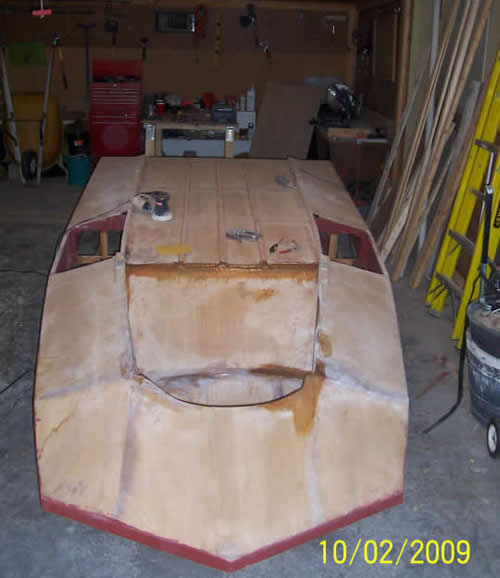
October 2nd, 2009: Well after over 2 years I finally got time to work on it again. I flipped it back over and with the help of my friend Brett we cleaned up the cut outs (I originally just quick cut them out with a jig saw since I was pressed for time). I have also fixed the crushing and advanced a little on the lift duct itself. At this point all I have to do is fill the holes and then I can finish off the bottom.
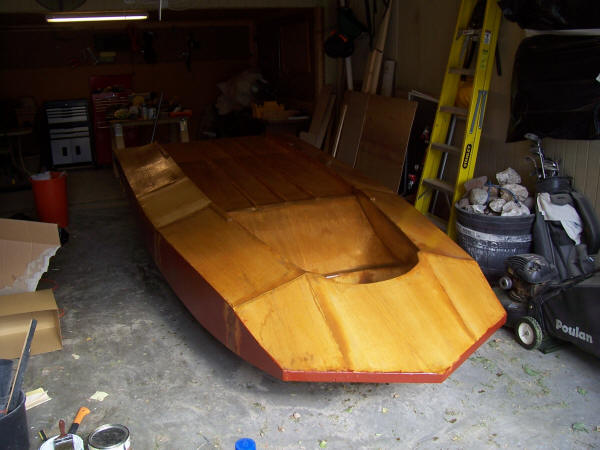
June 2011: Back to business. My goal this summer (2011) is to finish the bottom so I can flip it back over and work on the inside. Well to do that I had to finish fixing the holes that kept occurring every time I sanded down the edges of the lift duct and to smooth out the remaining edges. I also fixed the two holes I had to cut out for the wheel wells from the trailer. I finished all that, got it all smooth, and filled in all the holes. Then I purchased some sealant for the bottom. Since it is all plywood, I figured it probably needs some. That is why it looks much more glossy now than it did before. I also painted the sealant over the paint job that I did before (the red) on the sides since they most likely needed it as well. The next step is to put some bottom guard boat paint to help seal against mold and rot.
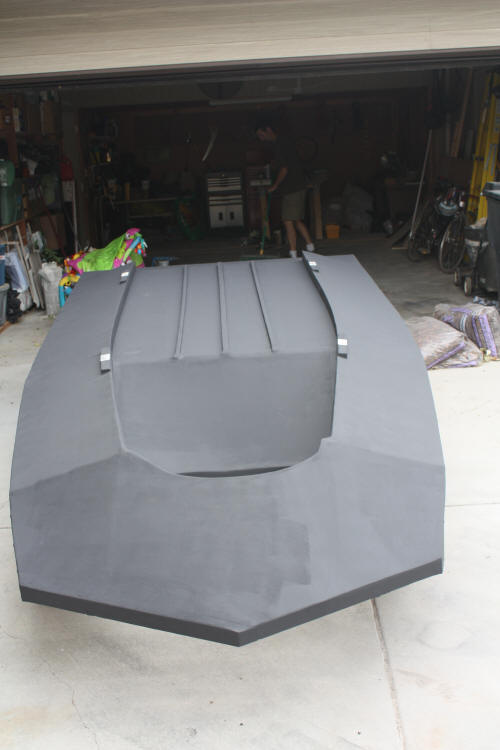
October 2011: The bottom guard paint has been applied (black) and it has been flipped over. This was the last task I wanted to complete for this year. Now onto preparations for next year.
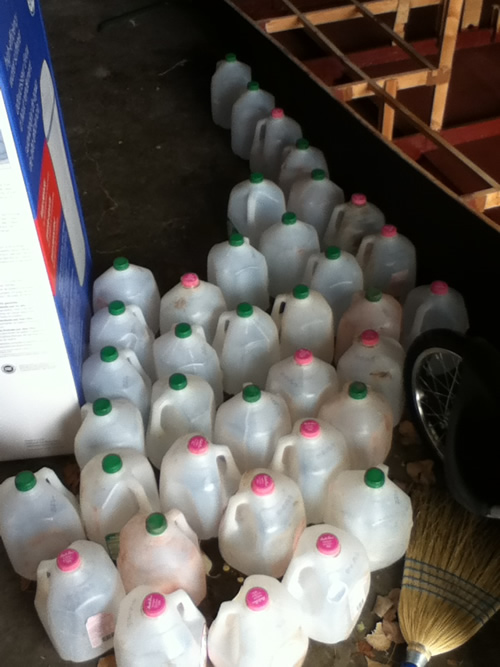
February 13th, 2014: Long gaps in being able to work on the hovercraft but here I am getting all of the milk bottles I have collected and sealing them closed to be able to fill up the hovercraft in case of an emergency. These provide a buoyancy that hopefully will help the hovercraft float if the engine fails.
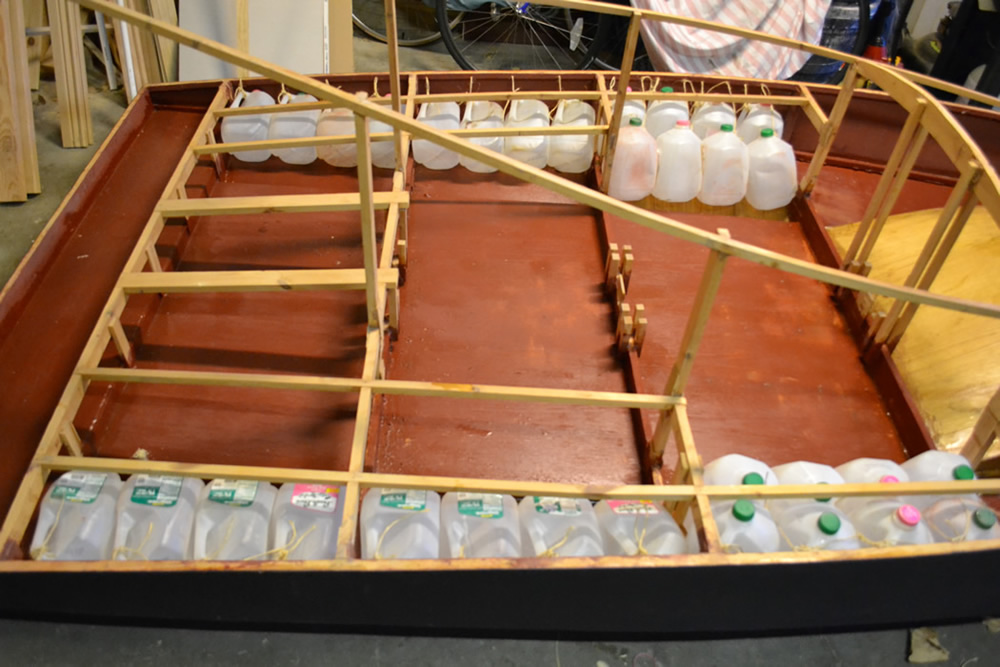
February 27th, 2014: Here is a view of all of the milk bottles installed into the hovercraft.
